Showing posts with label #seed. Show all posts

Tuesday, October 1, 2013

Ellien's Herb Garden Advice

Three summers ago, I planted some herbs in my vegetable garden as they attract the good insects, like bees.  They are so fragrant and so pretty next year I believe I will transplant some of them into my flower gardens.  The thyme would look so lovely around the bed of my roses.  I thought I would share with you the herbs I have planted and some uses for them.

Almost all of my herbs can be found in a Mediterranean garden.  In Minnesota, the oregano, sage, thyme, marjoram, and dill come back every year (are perennials).

The basil, parsley, and rosemary must be brought indoors as they cannot tolerate the cold winters, so I grow them in the garden and in pots that can be brought indoors. 
Oregano is considered a Latin-American herb that is closely related to the mint and marjoram family.   It is considered the "pizza" herb.   I add it to most of my tomato sauces, taco meat, stews, and lamb.  It is also known to help "cure" the cold or flu and can help with stomach upset.

Sage is native to the Mediterranean.  Most think of it as the "Thanksgiving" herb.  It is a rich savory herb with hints of pepper that goes beautifully with poultry or pork.  Sage has many more benefits then you would really think.  It is an anesthetic for the skin, treats respiratory tract and stomach disorders and has shown to treat Alzheimer's disease.

Thyme is of the Eastern Mediterranean and used in French and Italian cooking.  This herb is a powerhouse with it's fragrant pungent slightly minty flavor.  It is fabulous with any meat; I especially love it in beef stew.  Armenians make tea from its leaves, called Urc.  A wreath made of thyme will clear the air in your home.  It is widely known for its antibacterial and anti-fungal properties. I use it when I get bronchitis; it clears the lungs.

Basil is from Southeast Asia and widely used in Italian cooking.  It has a minty-lemon flavor with a hint of cloves or liquorice.  It is a must have for spaghetti sauces and makes a fabulous pesto when mixed with pine nuts, Parmesan cheese, and olive oil.  It's best friend is the tomato, but it also goes well with fish, poultry, soups and stews.  It has antimicrobial and anti-fungal properties, which helps with treatment of asthma and diabetes.

Marjoram is from Turkey.  It has a pine and citrus flavor that really enhances Italian and Mediterranean dishes; especially soups, stews, and sauces.  I use it almost every single time I use oregano because they are so closely related.  They seem to balance each other out and make the flavor more rounded.  It is great for stomach ailments.

  
Dill Weed is widely used in Polish, German, Norway, and Russian cooking.  It has a bright lemon tang.  I use it with creamed cucumbers, German potato salad, pickles, fish and with lamb.  It is fabulous when mixed with yogurt or sour cream.  I always add it to my Gyro Cucumber sauce.  It calms stomach gases.

Rosemary is a Mediterranean herb that carries a fragrant bouquet of sweet evergreen.  Its green citrus (orange) aroma is a fabulous addition to pork, poultry, beef, fish, and lamb, as well as soups and stews. It really adds depth of flavor to beef stew and to roasted turkey breasts.  When browned, it takes on the flavor of mustard which is an excellent pairing with ham.  Breathe in a rosemary infused steam bath and your lungs will almost instantly clear out.  It is great for clearing up acne and other skin blemishes.  At Christmas time hang a rosemary wreathe in your home or better yet, give one away as a gift.  It is a symbol of love and loyalty.

Parsley is a Mediterranean herb.  I have Italian parsley, not the curly leaf parsley variety.  The Italian parsley has better flavor and is full of vitamin C and K.  I use it in almost everything from adding it to salads to chicken noodle soup.   It has a green flavor that adds depth and moisture to hamburgers, turkey-burgers, or lamb-burgers.   It's part of Grandmother's "penicillin soup"; chicken soup made with loads of garlic and freshly chopped parsley will calm the worst cold.

Lessons Learned: 
The important thing I have learned about herbs is to approach them like I do a wine tasting; look at them, smell them, taste them and experiment with them.  See how they react with one ingredient or another.  Taste the before and after.  Add a little, taste, add a little more.  Get to know your herbs, the ones you like, the ones your family likes and use them.  They will turn ordinary bland chicken into a culinary masterpiece that is ALL YOUR OWN making!

Enjoy!


Monday, September 30, 2013

Canning Fall Harvest Tomato Soup (aka Spaghetti/Pizza Sauce)


Sorry it's been awhile since my last post.  My husband and I took our annual vacation to Rock Lake, which is remote and primitive.   Usually, by this time of year in Minnesota the tomatoes are really winding down.  We get real cool evenings, but are sometimes fortunate to get some remarkable September sunny days.  The tomatoes are not a big fan of the cool weather.  

This batch had some cracks from the cool weather, so I felt I wanted to try something new with them this year.  And, I am not bragging one bit, but this recipe is so versatile and so rich in flavor you can make soup (like I did here) spaghetti, pizza sauce, or even a fabulous dipping sauce for your next party that everyone will rave about and beg you for the recipe!  Yes, it is that good!

Plus, BONUS, when this is canned up, it will take you two shakes to serve it up and everyone will think you worked your fingers to the bone to create this dish; however, you decide to serve it up!  Check out below for my secrets to a successful soup/sauce:


Instead of adding the tomatoes to a boiling bath for a minute to ease the removal of the skins, I cut the cracks, dark spots, and tops off of them and put them on a cookie sheet.  I sprinkled salt and pepper on them and roasted the tomatoes in a 350 degree oven for 30 minutes.


I removed the skins first and then put the tomatoes in a sieve to remove the seeds.  Now, not everyone does this, but I do because I think it makes removing the seeds easier.  The sieve doesn't seem to get all gummed up so quickly.  I used my Mom's cone shaped sieve.  

If you have the luck to own your Mom's or Grandmother's sieve, here is some great advice on how to use it on many things other than removing seeds from tomato sauce:  Grandma's Coned Shaped Sieve


Push the tomatoes through your sieve until it looks like this.  You will have a smooth rich sauce to make your soup.  From two large cookie sheets of roasted tomatoes, I got 11 cups of tomato sauce.

Put your tomato sauce in a heavy bottomed pan to simmer, then assemble your spice base as follows.


I used everything pictured above, EXCEPT no lemon juice!  My tomatoes had a lot of zesty tang already, even after roasting in the oven.  You might question the Hungarian paprika, but it is a secret and a must use!  

My Grandmother Paquin's family immigrated from Eastern Europe and brought a rich array of recipes from Czechoslovakia, Poland, and Prussia, which has infiltrated my interest in using "Bohemian" spices.  If you follow me long enough, you will find Hungarian paprika is a stable in my pantry.  

Here is some more information on the varieties of paprika which may give you ideas on how to add them to your cooking:  "What's the difference - Paprika"


The other secret of mine is to brown your spices in olive oil.  The olive oil gives a rich depth of flavor to your spices and smooths out the tangy tomatoes.  I can't imagine tomato sauce without olive oil.  Plus, it is a lot better for you than animal fats, like pork, which they used in the "Old Country".

I added
  • 2 tablespoons olive oil in the pan and 
  • browned the 1/2 cup chopped onion and 
  • 1/2 cup chopped green pepper first until the onions turned translucent. 
  • I then added 5 minced cloves of garlic
  • 1/2 cup finely chopped garden fresh basil
  • 2 tablespoons finely chopped oregano
  • 1 tablespoon thyme, and 
  • 1 tablespoon red pepper flakes (you can omit or lesson this ingredient if you don't care for heat).  
Scrape all the goodness out of your pan into your tomato sauce, add 2 teaspoons salt and 1 teaspoon black pepper, turn the heat up to medium low and stir in the "secrets":  2 tablespoons Hungarian Paprika and 1 tablespoon brown sugar.

I taste tested my batch when it was at a medium low simmer for about 20 minutes, which I stirred every few minutes - you DON'T want it to burn or scorch on the bottom of your pan.  It reminded me of a fabulous tomato soup for ADULTS ;-), so I promptly ladled up my quart jars and canned them in the pressure canner for 25 minutes.  If you do pints, can for 20 minutes.

From the 11 cups of tomato sauce, I got 2 1/2 quarts of the richest soup you will ever enjoy!  Now, if you want, you can continue to reduce until it is a thick sauce; just pressure can at the same time frames listed above.  I found I did not have to do that because if I want to turn the soup to sauce, I can do it at the time of cooking up to serve.  Now I have soup and sauce!


Three Cheese Ravioli Tomato Soup Recipe
  • 1 quart jar Fall Harvest Tomato Soup (see recipe above)
  • 1 bag fresh 3 Cheese Ravioli
  • 1 cup 3 Italian Cheese Blend (finely shredded)
  • Thick Crusty Italian Bread
  • Olive Oil

Add olive oil to your sliced Italian bread and place in 350 degree oven to brown/warm.

Put your Fall Harvest Tomato Soup soup in a heavy bottom pan set to medium-high.

In a separate pan boil/cook the 3 Cheese Ravioli until the last three minutes, remove and add to boiling Fall Harvest Tomato Soup.  Cook the ravioli for another 3 minutes in the boiling soup; stirring frequently.

Ladle into bowls and top with the 3 Italian Cheese Blend.

Serve with Thick Crusty Italian Bread.  Makes four hearty servings! 


You will want to make EXTRA Italian bread for dipping.  This is a soup everyone will want to scrape clean with the bread!  I served my soup with a nice garden salad and it was a hearty meal!

Enjoy! 


Wednesday, September 11, 2013

Tomato's Best Friend - Basil!

This year it is still "Tomato" season, but I am sharing with you some advice o what to do with the tomato plant's best friend, Basil!  I always plant basil with my tomatoes.  Not only are they excellent together in sauces and stews, they help each other during the growing season.  The tomato plant offers a nice shade and the basil fends off pesky disease and attracts those coveted bugs to keep your tomato plants fertile and healthy!  Isn't that just like best friends to work towards the benefit of the other?

If you have not planted basil with your tomatoes, I urge you to keep um in mind for next year.

I use as much fresh basil as I can when it is fresh from the garden, but when winter comes, my basil will die off in this harsh Minnesota winter.  I can't bare to have much of anything go to waste and have tried a variety of methods to preserve basil.  Freezing is my favorite way to preserve that fresh basil flavor.  Here is how I do it:

Pick off the top lush branches, leaving the plant to grow and produce more.

Wash in cool water.
Clean them really well.  It is growing in the garden that harbors bugs!  You will want to wash all of them off before freezing.
Pull the leaves from the stem and discard with any browned or yellowed leaves.
Roughly chop.


I use my food processor.  Wipe the sides of the bowl when chopping to keep the chopped leaves uniform.
Measure when putting in your ice cube tray, then fill with water.  Tip!  Use filtered water or buy some spring water.  My favorite is Kandiyohi water.  Water does matter!  If you pour after in a glass and blind taste test it, you will notice a difference!  That flavor is added to your dish or mojitos!
Put in the freezer; once frozen place in a freezer bag marked with the amount in each cube.  Use for your next sauce or stew!

Stay tuned for one of my next posts with directions on making "basil" fresh mojitos!

TTYL!


Friday, September 6, 2013

Canning Salsa!

In keeping with the theme of "Tomato" season, I am sharing with you my salsa escapades!

Canning salsa has been an obsession of our family for as long as I can recall.  We all want to make the salsa our own.  This is my recipe which is taken from my Mom's recipe, my trips to Mexico, and a Canadian man's recipe who used lime juice in his salsa.

Over the years, I perfected my salsa by adding these "must have" features:
  • not thick, not runny
  • not too chunky (nothing worse watching someone try to put a huge glob of tomato on their chip!)
  • hot & spicy (Biker Billy jalapenos for heat; cumin for some smoke!)
  • cilantro (just like the pico de gallo I had in Mexico)
  • lime juice (adding a tart twist of Mexican flavor brightens up this salsa) 
  • not cider or white vinegar, but red wine vinegar (gives it a sweet smooth tangy flavor)
I remove as much of the seed and surrounding pulp from the tomato before finely chopping.  It is worth the effort to have a uniform consistency in your salsa!  If you want to see how to remove the seeds,go to my "Canning Tomatoes - Zucchina Pasta Sauce" post.
Everyone will tell you to wear gloves, be CAREFUL, when chopping up any hot pepper, and NEVER put your fingers in your eyes until after you have washed them.  Do that once and you will never forget this lesson.

But I am always looking for shortcuts, so I use my La Machine food processor to chop them up.  I roughly chop before putting in the food processor and use the spatula between chopping sessions to move the big pieces into the center until they are finely chopped.

  • If you don't care for too much heat, remove the seeds before chopping them up or consider using a less hot pepper or even green pepper.
When all the hot peppers are chopped up, they measure about 3 cups. 
I remove the skins, chop into quarters and use the food processor for the onions too.  When the large onions were chopped up, I got 3 cups.
If you have cilantro in your garden, pull up a few bunches and finely chop them until you get 2 and 1/2 cups.  Interesting fact about cilantro:  some folks eat cilantro and think it taste like soap - something in their taste buds!  I feel sorry for them.  Also, cilantro binds with mercury, which is good for removing mercury from your body, and it is just good medicine.  Here is the link to that fact, if you want to know more:  Cilantro Flushes Mercury from Body - Fact Analysis

I finely mince my garlic to the size of a tomato seed, so I have some pieces of garlic on the chip!
Put the tomatoes, hot peppers, onions, cilantro, garlic, ground cumin, tomato paste, red wine vinegar, salt and pepper in a large thick pot, bring it to a boil, then turn down to medium low to let it simmer.  Stir frequently so the salsa doesn't stick and burn on the bottom of the pan.  (See recipe below for the ingredient measurements)

I simmer my salsa by sight so that it is thickened up but not like tomato paste thick.  I like a bit of juice in mine.  It looks like this picture.  It can take anywhere from 30 minutes to an hour or more. 


When ready to jar up, add 3 tablespoons bottled lime juice to each pint jar, then seal up, and process in a pressure canner for 20 minutes at 10 lbs. pressure.  If you want to know how to pressure can, go to my "Canning Tomatoes - Zucchina Pasta Sauce" recipe.
Now, we couldn't wait to share our Bishop Salsa - Hot & Spicy with friends.  What is a great Mexican style salsa without a great sip of tequila?!  Make sure your tequila is 100% agave or you may end up with a headache.  

Another great tip is to serve your salsa with Whole Grain Milling Organic Tortilla Chips.  These tortilla chips are produced (grown and milled) right here in Minnesota - Welcome, Minnesota!  The corn is NOT the GMO variety and is organic!  The real bonus is it is hi lysine cornmeal, corn flour or whole corn - a highly nutritional corn with a complete protein.  Most corn you get nowadays is full of sugars and very little protein!  Plus the flavor will compliment this tart, hot, and spicy salsa!

Enjoy!


Saturday, August 31, 2013

Quesadilla Style Grilled Cheese Sandwiches with Pico de gallo

From the first fresh ripe red tomato until the end of the season, we have garden fresh pico de gallo.  In spite of the last three weeks of no rain and 100 degrees plus weather, this "Tomato" season is still in full force with tomatoes coming in ripe and fresh.

To continue with the tomato theme,  I am sharing with you my pico de gallo recipe that I love to serve up with Quesadilla Style Grilled Cheese.


I am using a "Garden Salsa Hot Pepper" and a "Biker Billy" jalapeno pepper in my pico de galla recipe.  This is my first year growing "Garden Salsa Hot Peppers" because the "Biker Billy" jalapeno transplants didn't fare that well.   While "Biker Billy" jalapenos are my all time favorite for "heat" and flavor, I have to admit I am pleased with the addition of the Bonnie Plant's "Garden Salsa Hot Peppers" to my salsa and pico de gallo.  The two distinct peppers in the pico de gallo added another layer of zest and heat to the dish without overpowering it.  If you get a chance to try it out, you won't be disappointed.  But, if you don't have one or the other, go ahead and use what you have for hot peppers.

 I like my pico de gallo dry, so I seed all my tomatoes before chopping them up real fine.  The way I seed them is to cut them in half and gently squeeze over the sink until all the seed pods and gel around the seed pods come out, sometimes I poke my finger in the pocket to remove the seeds and surrounding gel.  If you don't have a garbage disposal, squeeze the seeds out over a plastic bag to drain and toss in the garbage or compost pile.
Pico de Gallo Recipe:
  • 4 large ripe tomatoes, seeded and finely chopped.
  • 1 "Garden Salsa Hot Pepper", finely chopped (I use the seeds to add heat to my pico de gallo, if your family doesn't like heat, remove the seeds)
  • 1 "Biker Billy" jalapeno pepper, finely chopped (for less heat, remove the seeds)
  • 1/4 cup finely chopped onion
  • 1 teaspoon finely chopped garlic
  • 1 Tablespoon cilantro (fresh finely chopped is best, but I had to use dry in a pinch - if you use fresh, add another tablespoon.)
  • Juice from 1/2 lime (if you use canned lime juice, slowly add until it is at the flavor you like)
  • Salt and pepper to taste
That is all there is to it, mix it all up in a bowl and serve!  In our home we never have left overs, but if you do, make sure to refrigerate!

Now here is how I make Quesadilla Style Grilled Cheese Sandwiches:
To make two quesadilla style grilled cheese sandwiches, you will need:
  • 3 slices American cheese (I am old school and stuck on Velveeta)
  • 3 oz finely sliced cheddar cheese (I used Collier's because it is one of the cheddar cheeses that has a slight sweet taste, which compliments the Velveeta and contrasts well with the pico de gallo)
  • 4 flour tortillas
  • 2 Tablespoons butter (I only use organic)
  • 1 Tablespoon olive oil (in the pan to prevent over-browning of the butter)
 
Pour olive oil in a frying pan, spread around, turn the heat to medium.  Lightly butter one tortilla, place it in the frying pan butter side down.  Place the American cheese on top of the tortilla, then put the cheddar cheese on top of that covering any spaces.
Butter another tortilla and place it on top of the cheese.  In a minute or two, the tortilla will brown, when it browns, turn it over to let the other side brown.  Do this carefully, as the cheese will have melted.  You have to flip it like a pancake, if you want to keep the cheese from sliding out.
Keep the cheese that spills out the sides and let it brown up crisp.  You can put them on top when done.  The kids will love the cheesy crunchy bits!

When it is browned on both sides, put on a plate to cool for a couple minutes and put another buttered tortilla on the fry pan, layer with cheese, and brown.  You do not have to add more olive oil for the second one. Let that one cool too.

If you try to slice it too soon, the cheese will spill out all over the place.  I use a pizza cutter to slice, but you could use a knife instead.
I serve my quesadilla style grilled cheese sandwiches topped with the fried cheese bits alongside a good serving of garden fresh pico de gallo.  The tangy spicy heat of the pico de gallo is a perfect match with the quesadilla style grilled cheese - spicy, creamy, sweet-sharp, crunchy, and bright all in one delicious bite!  And bonus - it is so easy to make!


Wednesday, August 28, 2013

Canning Tomatoes - Zucchini Pasta Sauce

Cearle and Me! (circa early 1990s)
This is "Tomato" season carried on into canning 101 - Cearle and Ellen style!                            

When I first started out, I helped my Mom out in the kitchen, but when we got out on our own, my sister Cearle and I embarked on the adventures of learning to can.  If you can can with your Mom, a friend or a sister, count yourself as very fortunate! It is way more fun and a lot less work.  And, it is scientifically proven women who share life with friends are healthier and live longer!  I will always treasure those days spent in the kitchen with my Mom and my baby sister learning how to can together. 

Over the years, we tried everything and had tomatoes everywhere!  In our humble opinion, from a few very messy experiences and the amount of work that goes into it, don't try making tomato juice.  It is simply not worth it.  But canning whole tomatoes, salsa, and sauces is well worth the effort.  It is cheaper than store bought, the flavor is better, and you get to control what goes in the jar!  It is never too late to start; here is some advice to get you going.

In years past, we waited until just past peak to pick tomatoes from the Twiehoff Gardens and Nursery because money was short and we did not have enough yard space for that size of a garden.  

Generally in Minnesota, you should be able to buy a 1/2 bushel of tomatoes for around $35, but at Twiehoffs, if you pick them yourself after peak season, you can get them for much cheaper, at least back then you could.  

If you live in the Faribault, MN area, you should really check them out for their fruit and vegetables, you will not be disappointed.  The owners are the most down to earth honest people you will ever meet and their gardening practices are bar none. You will feel like you have just went down home country at Twiehoff's.  Home Sweet Home in the Garden!

I always wash my jars in a dishwasher when I get them new from the store or if I just used up a jar of tomatoes during the winter.  I store the jars rim side down in the cabinet so the quart jars are ready to put in a clean dishwasher on the steam mode wash cycle (very hot water and hot heat dry) to sterilize them.  When the cycle is finished, I leave them in the dishwasher to keep them real hot until ready to use.  If you don't have a dishwasher with high heat, wash them thoroughly and put them in a pot with some boiling water.  Make sure they are spotlessly sterile and hot when you use them! 

After setting my jars in the dishwasher, whether you pick your own or purchase some, you will want to wash the tomatoes before putting them in a pot of boiling water. 
It takes about a minute for the skins to crack, so while your water is setting to boiling, make sure you already have the ice water set up.  I use a slotted spoon and have an extra bowl to carry the hot tomatoes into the ice water.
Use a paring knife to peel the skins off and to cut the top green cores off the tomatoes.  This is very important: put your skins and tops in a disposable plastic bag.  I use the few plastic shopping bags I get when shopping.  When I was younger, I thought it would be easy to run them through the garbage disposal, well DO NOT do that unless you want to drag your husband into the kitchen to fix the garbage disposal.  I use a plastic bag, so I can pop some holes in the bottom of the bag to make it easy to drain the excess liquid before tossing in the garbage.  

If you have a compost pile or drum, you are fortunate and you know what to do with those scraps!

So, this year I had tomatoes, basil, and zucchini to put up and figured I'd alter a canning recipe to put them in a pot together.  The following is the recipe for my Zucchini Pasta Sauce. If you just want to can up the tomatoes, skip down to the part about canning crushed/whole tomatoes down below:


  • I finely chopped up 1/4 cup basil leaves.  Note, make sure they are blemish free!
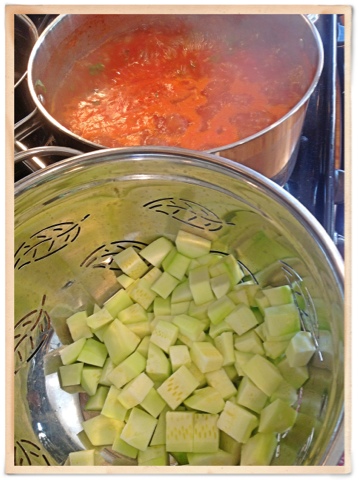
  • I peeled and diced up 2 medium zucchinis into bite size pieces
  • and added them to 12 medium to large (not huge) blanched and peeled tomatoes. (Some people like to crush the tomatoes with their hands, but I prefer to use a potato masher or you could use a fork.) 
  • To this pot, I also added 4 cloves pressed garlic, pressed through a garlic press (my favorite is Pampered Chef's)
  • and 1/2 medium onion chopped finely.
I brought this pot to a boil and boiled the zucchini pasta sauce for 15 minutes or until reduced by about an inch from the top of the soup pan. My mother taught me to remove the cloudy film that formed at the top of the pot, so I take a spoon and skim off the cloudy film/foam off the top and toss that away.
If you are canning crushed/whole tomatoes, I boil mine for five minutes before putting in the clean jars, but you can cold pack them too, just make sure they are filled within 1/2 inch of the top of the quart jar.  

If you are canning the Zucchini Pasta Sauce, fill the quart jar within 1/2 of the top of the jar. 

For either crushed/whole tomatoes or Zucchini Pasta Sauce:
  • Add 1 teaspoon canning salt (Yes there is a difference - look in the canning isle at the market!)
  • Add 2 Tablespoons bottled/NOT fresh lemon juice or 1/2 teaspoon citric acid (You can find citric acid in the canning isle too.)
Make sure you exactly follow your manufacturer's instructions for preparing and processing the pressure canner.  This is NOT something to mess with at all!  

Heat your lids in a small saucepan of boiling water.  It should only take about a minute; don't over boil your lids!  After wiping the rim of the jars to wash off any trace of food particles (I use a clean slightly damp flour cloth towel wrapped on my pointer finger tip), put on your lids and screw the ring over-top.  Only hand squeeze the ring; there is no need to squeeze it over tight.  

Place your jars in the pressure canner at 10 lbs pressure and process as follows:
  • 25 minutes for crushed/whole tomoatoes
  • 35 minutes for Zucchini Pasta Sauce.  

As you can see from the photos, I got 3 and 1/2 quarts of Zucchini Pasta Sauce.  You will either need to freeze or use the left over 1/2 quart.  This is what I did with mine to make two good sized servings of pasta, as the main course.
 

I always make my own chicken broth, if you don't you can purchase your favorite brand to make up about 1 and 1/2 cups of chicken broth.  (If you want to know how to make your own chicken broth, send me a comment and I will share.)  
  • Add the 1 and 1/2 cups of  broth to the Zuchinni Pasta Sauce pan (mine is from the canning). 
  • Add 1 Tablespoon lemon juice (if you use your canned sauce, don't add more lemon juice)
  • Bring it to a boil, then add 1 cup dry mostaccioli (or your favorite pasta)
  • Turn down to medium low and cover
  • Stir often until pasta is tender.
  • I added 1/2 lb browned ground lamb (this is totally optional - bet it would also be great with grilled chicken!)
  • I added 1/2 Tablespoon red pepper flakes because my husband likes it spicy (this is also optional)
  • Season to taste with salt and pepper 
I added some shredded Parmesan cheese to mine and served with grilled baby broccoli and garlic toast.  My husband explained; "It is so creamy".  "I love it".  This is good because we have at least three quarts to eat up this winter!